
Step-by-Step Guide to Installing Outdoor Railings
Key Takeaways
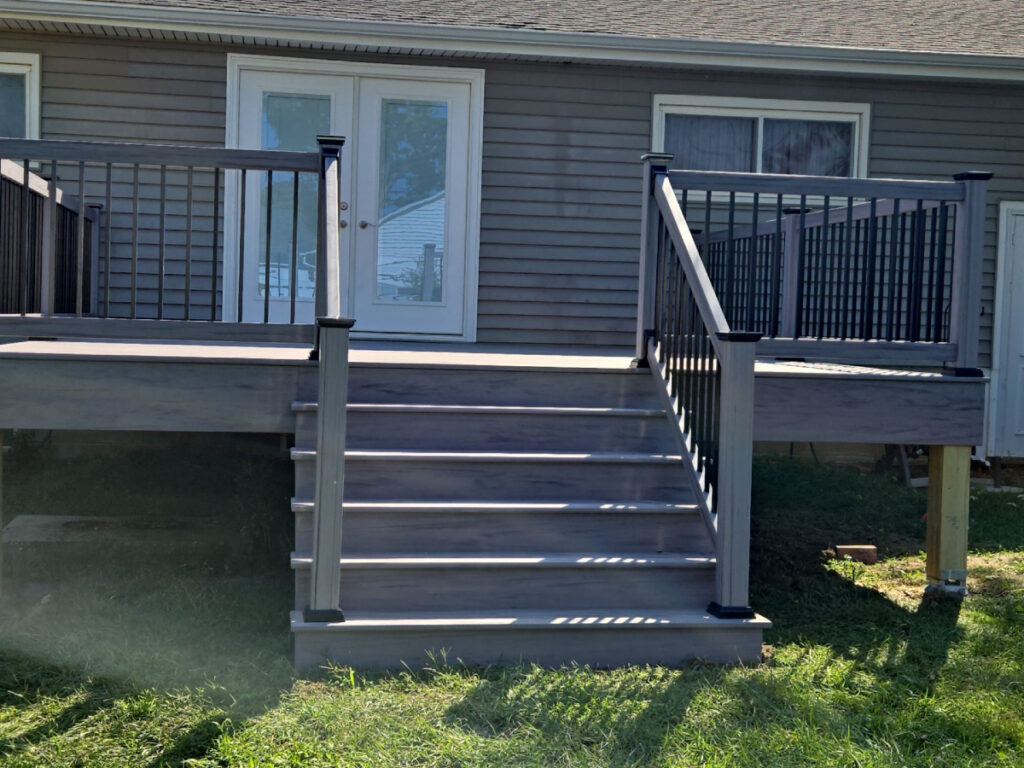
Outdoor railings not only enhance the safety of your space but also add a touch of style and charm to your home. This guide walks you through the process of installing outdoor railings, ensuring your project is safe, sturdy, and professional-looking. Whether you’re in Aurora, IL, or anywhere else, this step-by-step guide will simplify railing installation for your home improvement project.
Outdoor railings are essential for both functionality and aesthetic appeal. They create a safe environment for you, your family, and your guests while amplifying the overall look of your deck, porch, or stairway. If you’re considering installing outdoor railings, this guide from ReVamp Fence & Deck will help you get it done right, step by step.
Tools and Materials You’ll Need
Before you begin, gather these essential tools and materials for a smooth installation process.
- Measuring tape
- Level
- Drill and drill bits
- Screws and anchors
- Saw or cutting tool (if you need to adjust railings to fit)
- Post caps and hardware kit
- Protective gear (gloves, safety goggles)
Preparation is key to making your railing installation seamless (and avoiding unnecessary trips to the hardware store).
Step-by-Step Railing Installation
1. Measure and Plan
Start by measuring the area where the railing will be installed. Having precise measurements ensures you purchase the correct lengths and hardware.
- Mark the spots where the posts will go, ensuring they’re evenly spaced.
- Check local building codes in Aurora, IL (or your location) to ensure compliance with height and spacing regulations.
2. Secure the Posts
The posts are the backbone of your railing system. Install them securely to ensure the structure is robust.
- Drill pilot holes in your mounting surface to prevent cracks.
- Use anchors or screws to attach the posts securely to the deck or ground.
- Confirm the posts are perfectly vertical using a level.
3. Attach the Top and Bottom Rails
Once your posts are set, it’s time to add the rails.
- Start with the bottom rail. Ensure it’s parallel to the deck or ground and attach it to the posts with screws.
- Measure and cut the top rail, ensuring it aligns perfectly with the posts. Attach it using screws and brackets.
4. Install the Balusters or Panels
Balusters (or panels) create the protective barrier between the top and bottom rails.
- Install each baluster evenly, following measurement guidelines for spacing provided by the hardware.
- Screw each baluster into place, double-checking that the spacing is consistent.
5. Finish with Post Caps and Touch Ups
Once your structure is sturdy, add the finishing touches.
- Place decorative post caps on the top of each post for a polished look.
- Inspect the railing to ensure all screws are tightened and there are no loose components.
6. Check for Safety and Stability
Finally, test the railings to ensure they can withstand pressure. A properly installed railing will be sturdy and secure, offering confidence in its functionality.
Why Choose ReVamp Fence and Deck
Based in Aurora, IL, ReVamp Fence & Deck specializes in creating safe, stylish, and durable outdoor features. Whether you’re tackling projects like railing installation or looking for professional guidance, our team is here to help. We provide expert craftsmanship and adhere to all local regulations, ensuring your outdoor space meets the highest standards.
Final Thoughts
Outdoor railing installation doesn’t have to be an overwhelming task. By following these steps, you can add secure and attractive railings to your outdoor space. However, if you want a hassle-free, professional installation, leave it to the experts.
ReVamp Fence & Deck is ready to help you transform your outdoor space. Contact us today to schedule a consultation or learn more about our railing installation in Aurora, IL!